Use Matching Rules to filter for and match the values of any field from the imported statement to any relevant table in Business Central and find the relevant subledger or ledger account to which the statement entry will be applied and journaled.

Matching Rules
Menu3.0.1 Automatic Matching Rules
- Click on the navigation menu item popup Rules.
- Click on the navigation menu item Matching Rules.

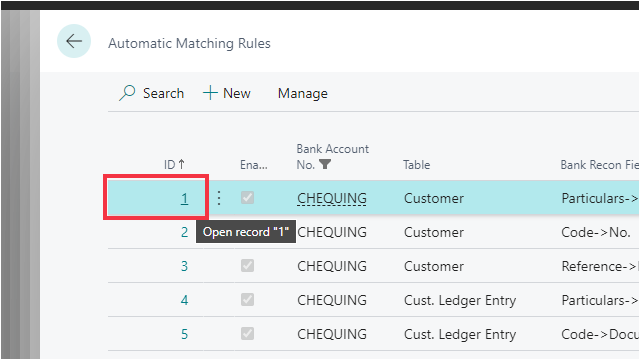
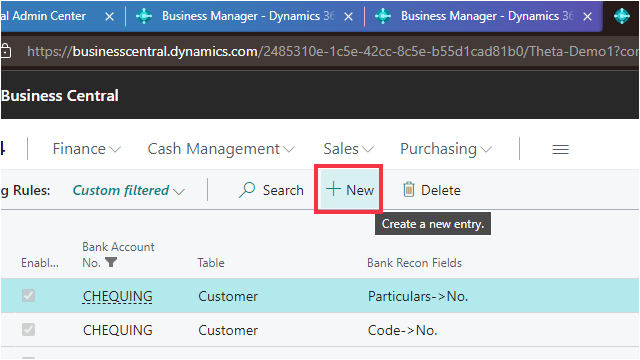
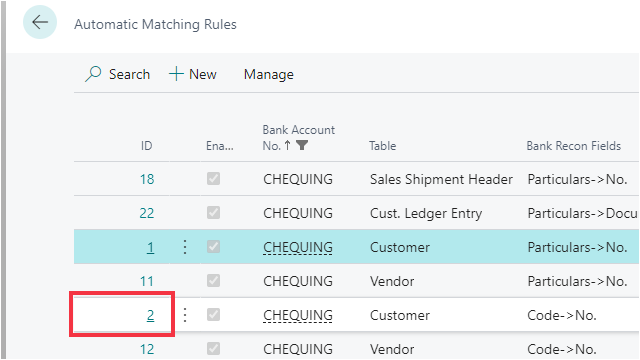
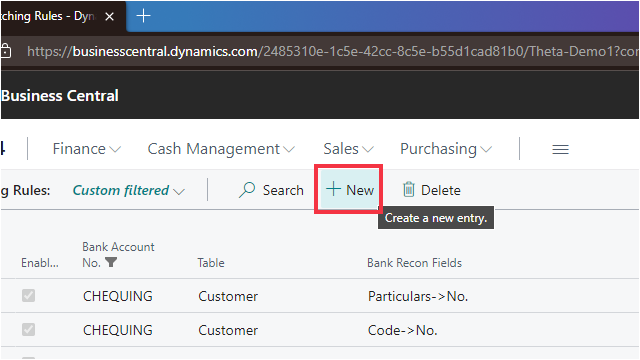
There are pre-loaded rules, which can be changed, removed and added to. Here we see the Automatic Matching Rules page
- ID is an automatically generated number for rules, they are not editable.
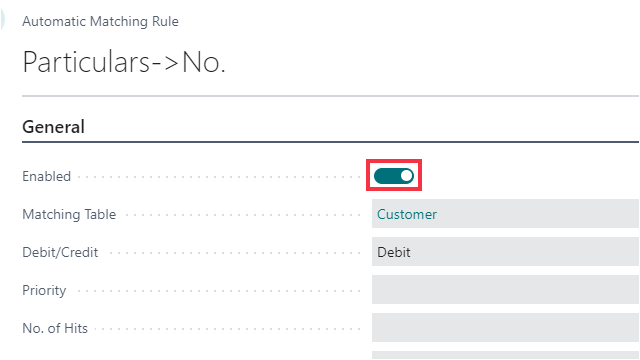
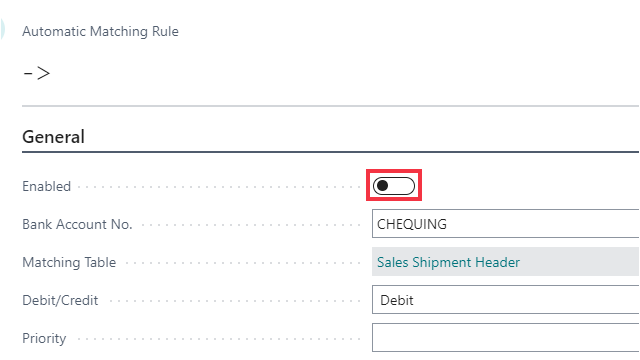
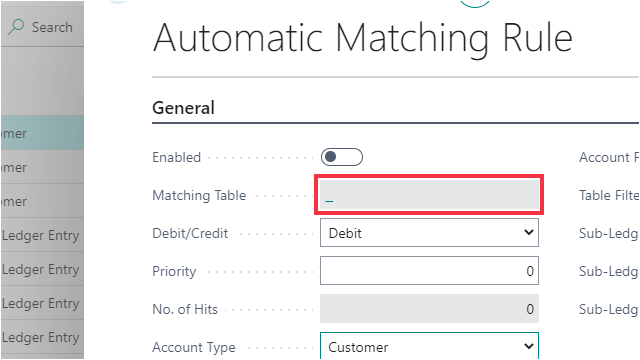
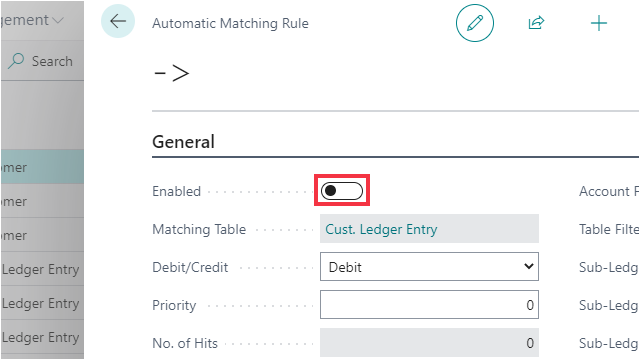
- Enabled must be engaged for the rule to apply.
- Bank Account No. is the bank account that this rule applies to.
- Table is the table that is used to search for the reference.
- Bank Recon Fields shows the reference field used, and what field it is matched against.
- Debit/Credit defines if this rule is used for credits only, debits only, or both. Remember that debits show as positive numbers on the bank statement which are often customer payments, and credits are negative numbers on the bank statement which are often payments to your vendors.
- Priority sorts the sequence of rules to run through you have multiple rules that apply to a given line.
- No. of Hits represents the number of time this rule applies to the current statement.
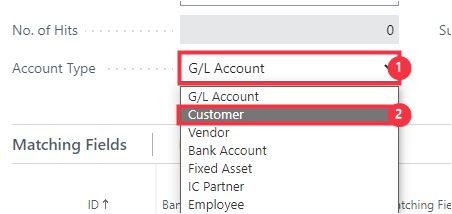
- Account Type is the record type to which the statement line will matched against.
- Account No. Field is the field from the Matching Table that will be assigned as the "Account No." on the journal line resulting from the matching.
- Table Filter optionally sets a filter on the matching table for the records to be included in this matching rule. For example, If you only want to search on Vendor Bank Accounts that are enabled for EFT, you can utilise table filters on the matching rule.
- Sub-Ledger Auto Apply Method 1 is the method in which to apply to the sub-ledger for suggested application.

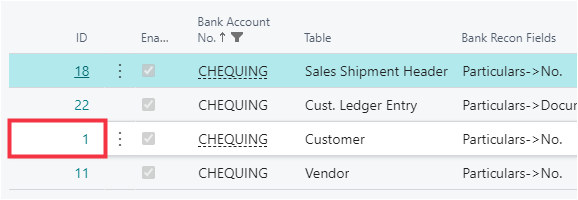
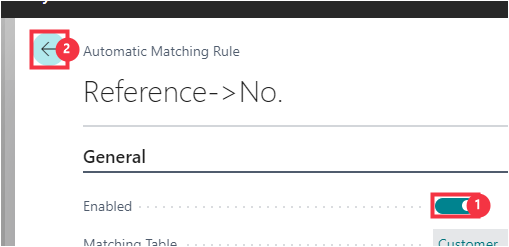
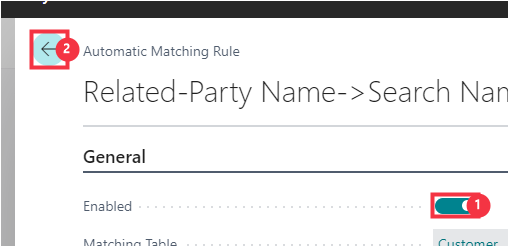
You can open the rule in full by clicking on the value in the cell ID
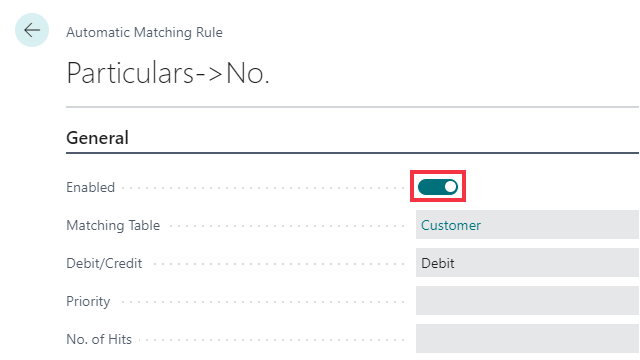
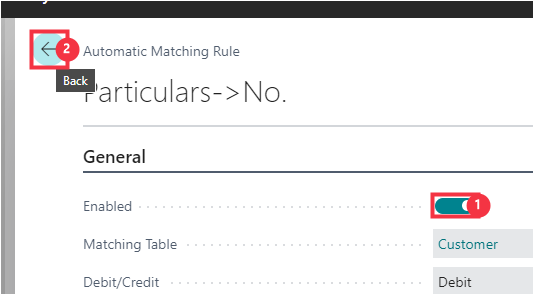
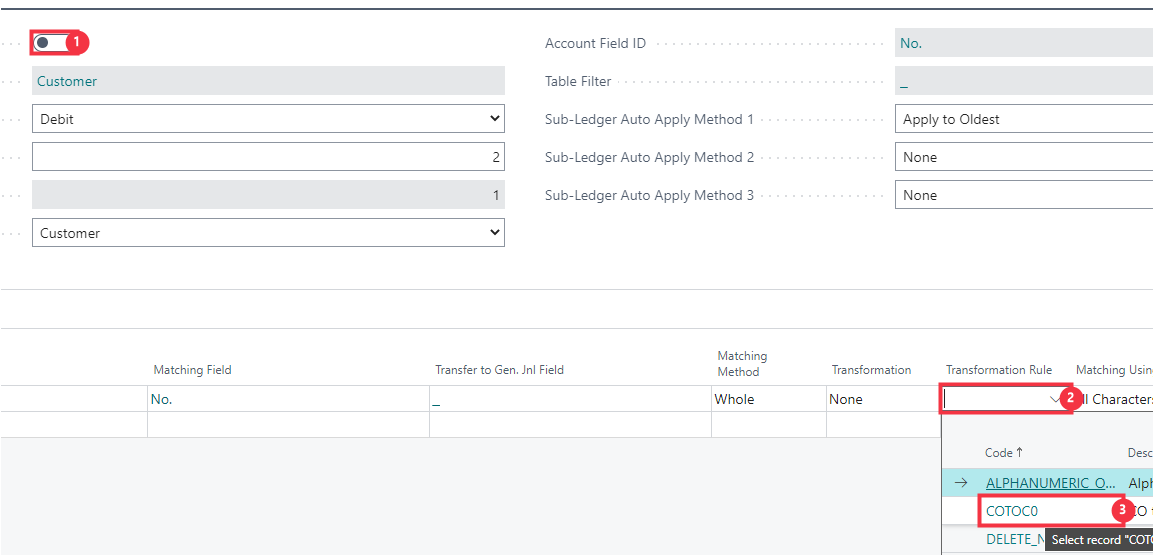
To make any changes to an Automatic Rule you must set Enabled to false.
- Bank Recon Field is the field to match from the imported statement.
- Matching Field is the field the Bank Recon Field is matched against.
- Transfer to Gen. Jnl Field Allows you to specify that this column should be transferred to the general journal when the entries are transferred. You can only select fields that are already setup in the Custom Fields page.
- Matching Method Whole: the statement field value has to match to the whole matching field value. @Keyword. Starts with: Find the record where the Matching field begins with the Statment field value. @Keyword*. Ends with: Find the record where the Matching field ends with the Statement field value. @*keyword. Contains: Find the record where the Matching field contains the Statement field value. @*keyword*. .
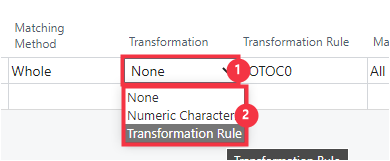
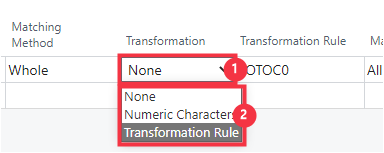
- Transformation can define numerical characters only, or use of a Transformation Rule.
- Transformation Rule is the rule that will be applied if Transformation is set to Transformation Rule.
- Matching Using specifies what part of the Bank Recon Field will be used for matching. This value is used in conjunction with the matching precision when the selected option is not equal to "All Characters".
- Matching Precision specifies the number of characters that will be used from the Bank Recon Field for matching. If there are fewer characters in the Bank Recon Field than the number specified here then the rule will not be used.
- Case Sensitive specifies if the matching is to be case sensitive or not. If not engaged, then it will match regardless of case.

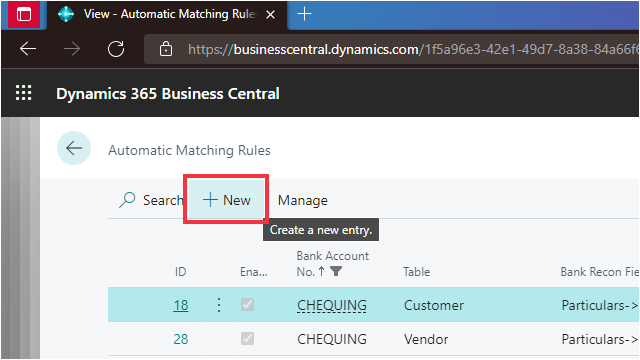
3.0.2 Automatic Matching Rule Creation
We will now make a new Matching Rule to match the first reference field to the Posted Sales Shipment number to find the Bill-to Customer No. to allocate the transaction against.
Click on the link New
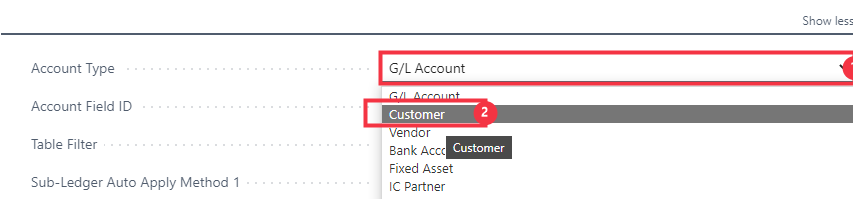
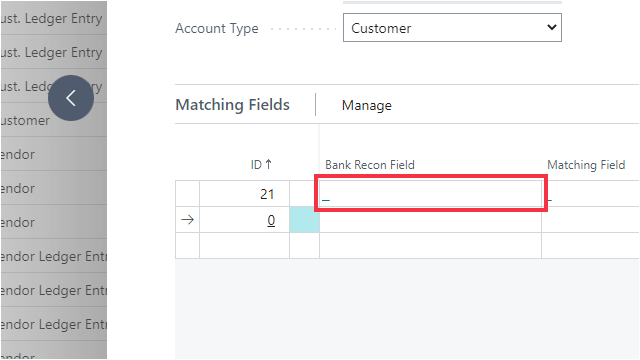
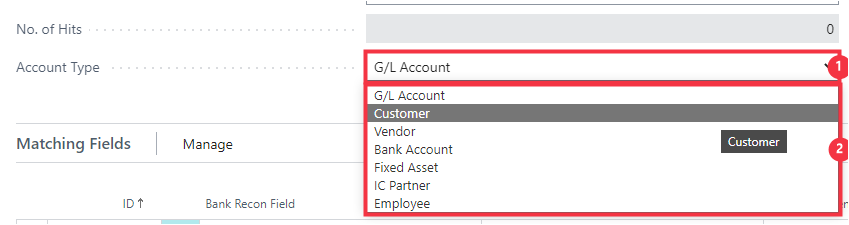
- Click on the field Account Type.
- Click on Customer.
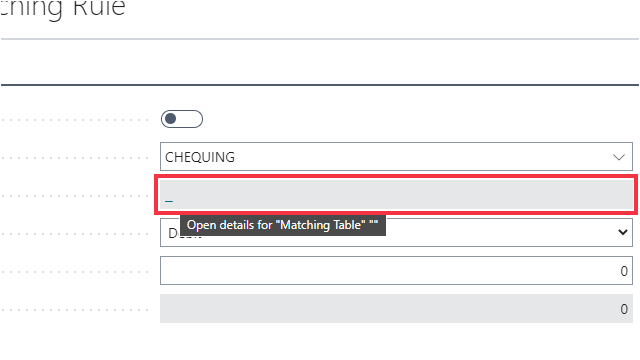
Open details for "Matching Table" ""
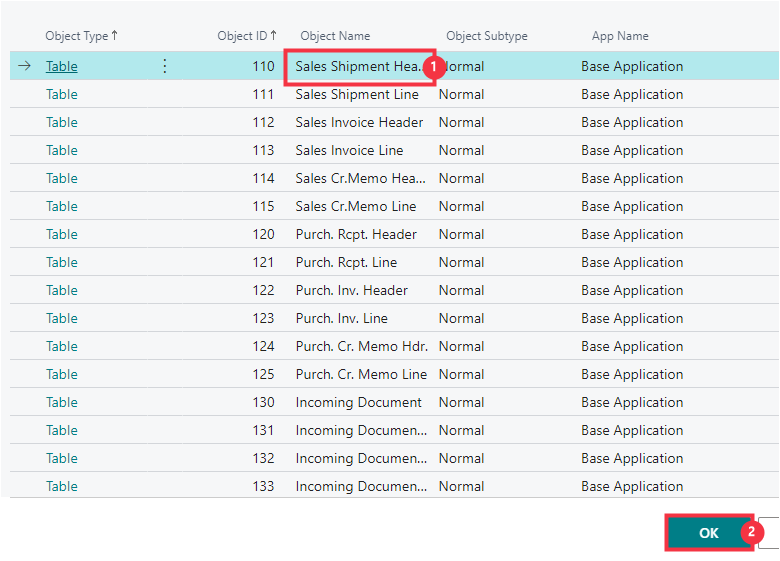
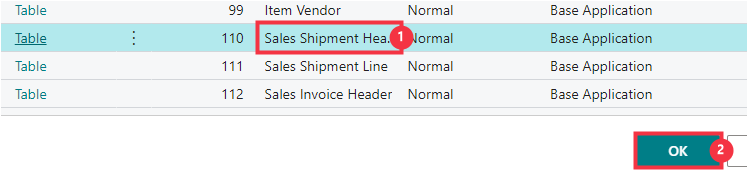
- Click on the cell Object Name with the value Sales Shipment Header.
- Click on the button OK.
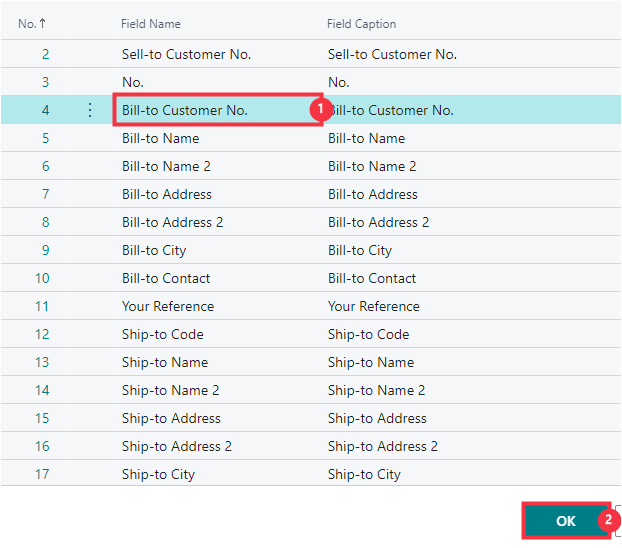
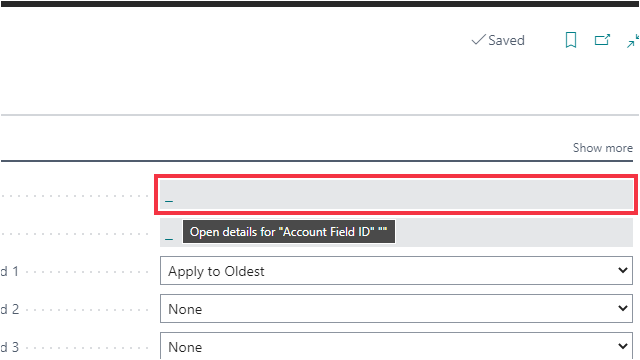
Open details for "Account Field ID" ""
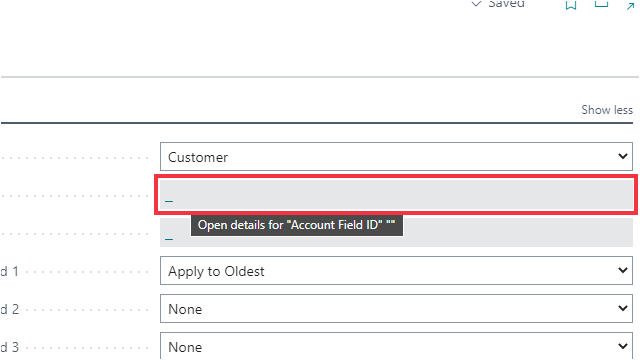
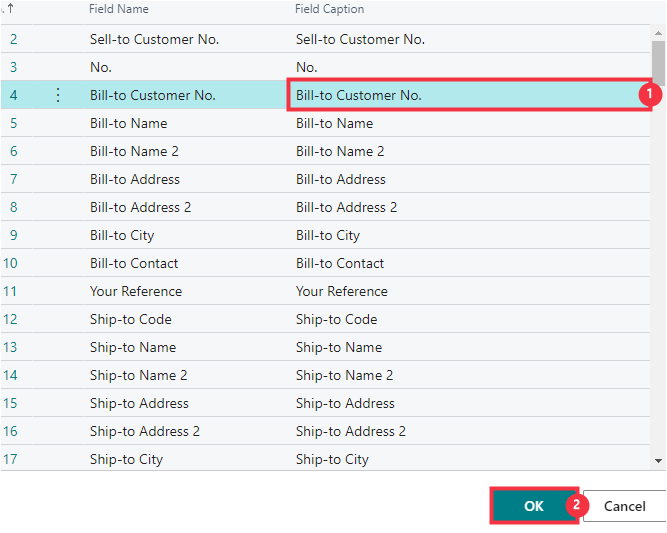
- Click on the cell Field Name with the value Bill-to Customer No..
- Click on the button OK.
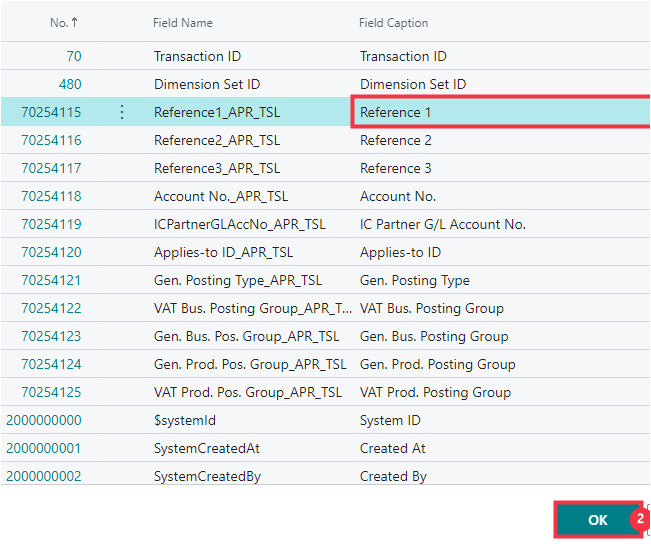
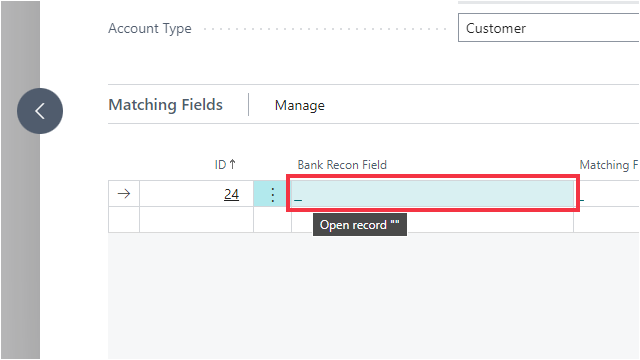
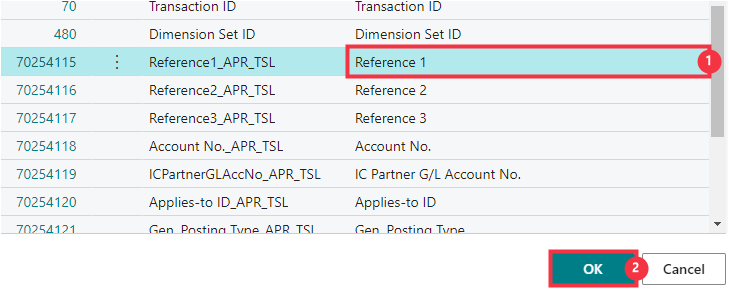
Click on the link in cell Bank Recon Field
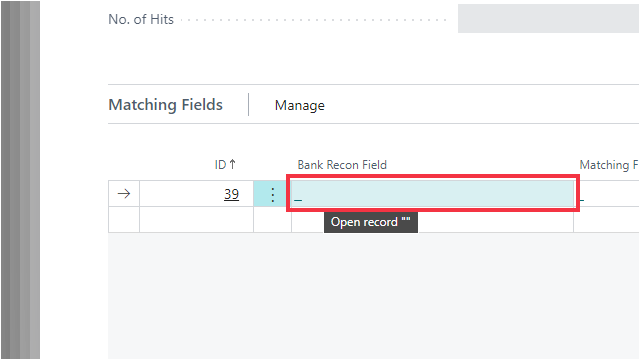
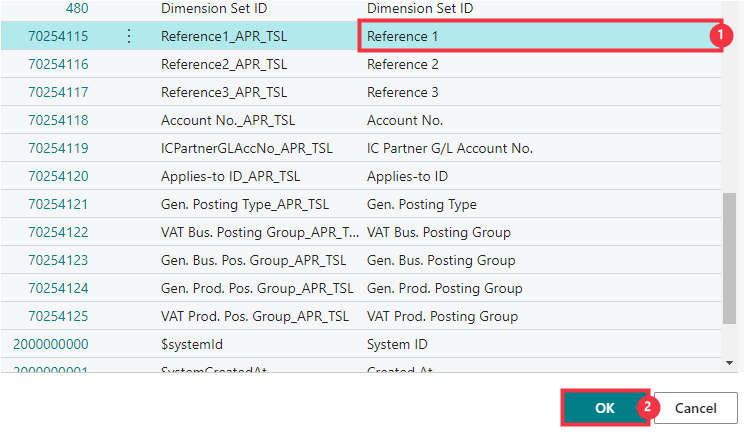
- Click on the cell Field Caption with the value Reference 1.
- Click on the button OK.
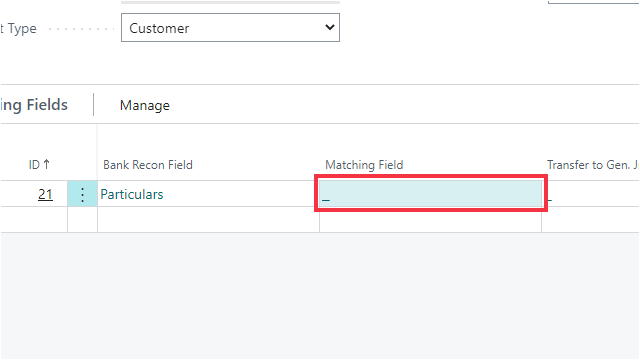
Click on the link in cell Matching Field
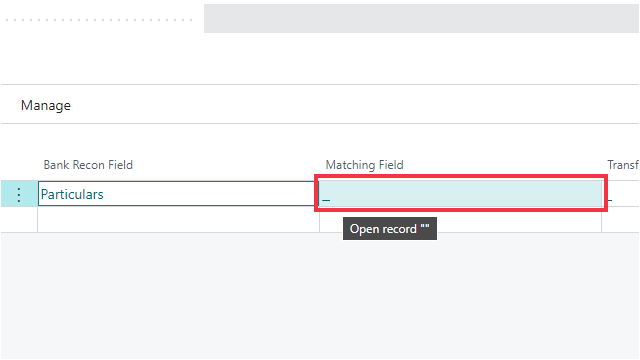
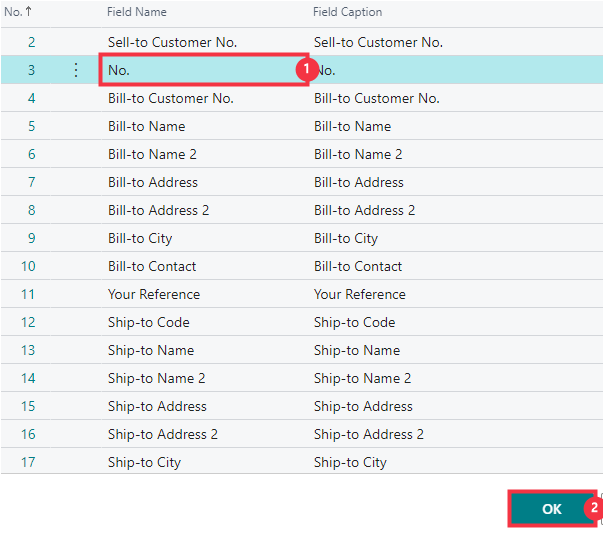
- Click on the cell Field Name with the value No..
- Click on the button OK.
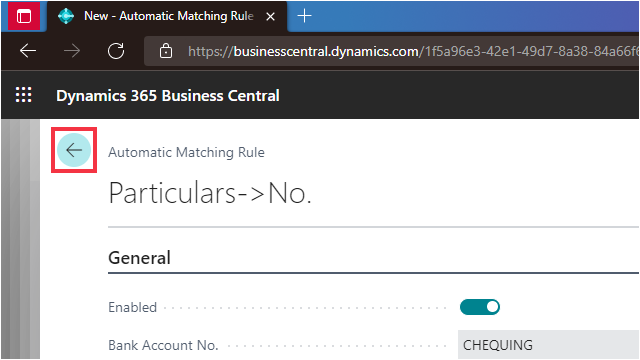
Click on the toggle field
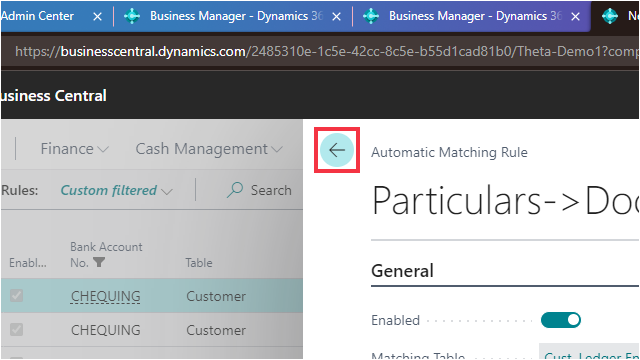
Click on the back button
We will now make a new Matching Rule to match the first reference field to the Document No. on the Cust. Ledger Entry to find the Customer No. to allocate the transaction against.
Click on the navigation menu item New
- Click on the field Account Type.
- Click on Customer.
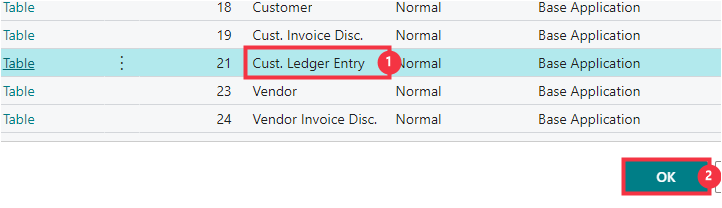
Open details for "Matching Table" ""
- Click on the cell Object Name with the value Cust. Ledger Entry.
- Click on the button OK.
Click on the link in cell Bank Recon Field
- Click on the cell Field Caption with the value Reference 1.
- Click on the button OK.
Click on the link in cell Matching Field
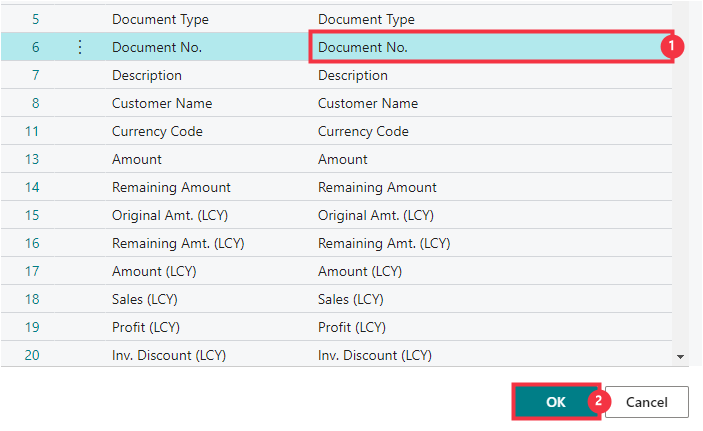
- Click on the cell Field Caption with the value Document No..
- Click on the button OK.
Click on the toggle field
Click on the back button
We will now create a Transformation Rule to correct a possible mistake on a Customer's payment references and apply it to Automatic Matching Rules.
- Click on the cell ID with the value 1.
Click on the toggle field
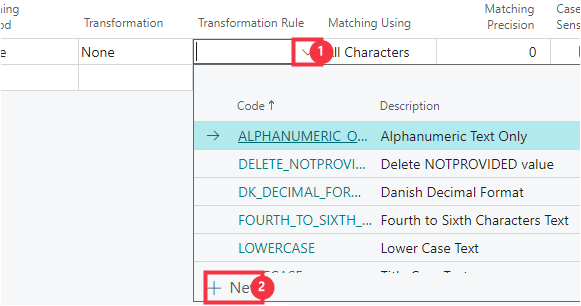
- Click on the lookup button in the cell Transformation Rule.
- Click on the link New.
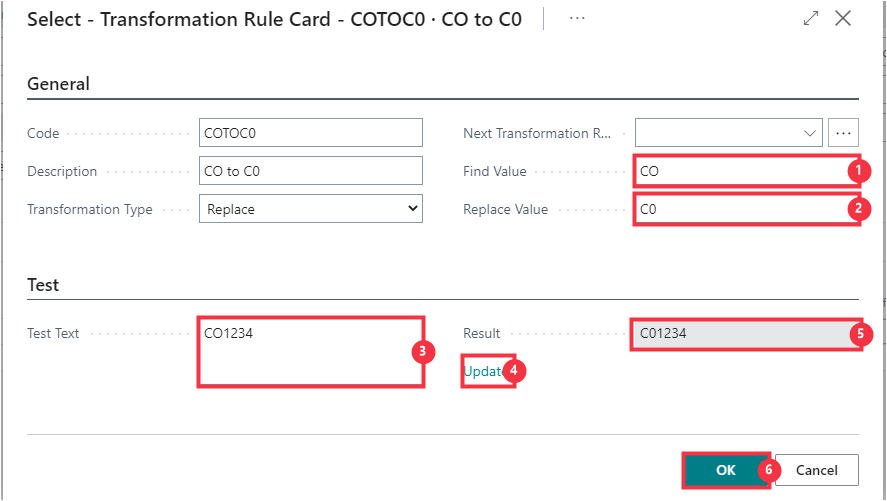
- Click on the field Code - Enter the text COtoC0.
- Click on the field Description - Enter the text CO to C0.
- Click on the field Transformation Type.
- Click on the item Replace in the list.

We will transform a reference entered as the letter C and letter O rather than the number 0 (zero).
- Click on the field Find Value - Enter the text CO.
- Click on the field Replace Value - Enter the text C0.
- Click on the textarea Test Text - Enter the text CO1234.
- Click on the field Update.
- See the Result to see the letter C followed by numbers zero, one, two, three, four.
- Click on the button OK.
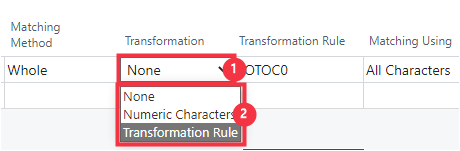
- Click on the cell Transformation.
- Click on Transformation Rule.
- Click on the toggle field .
- Click on the back button.
Click on the link in cell ID with the value 2
- Click on the toggle field .
- Click on the cell Transformation Rule .
- Click on the link in cell Code with the value COTOC0.
- Click on the cell Transformation.
- Click on the item Transformation Rule in the list.
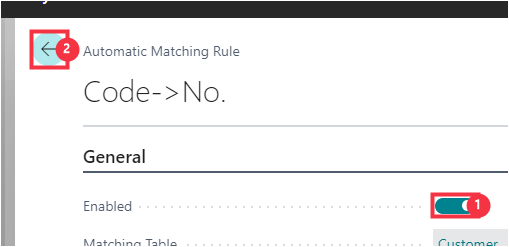
- Click on the toggle field .
- Click on the back button.
Click on the link in cell ID with the value 3
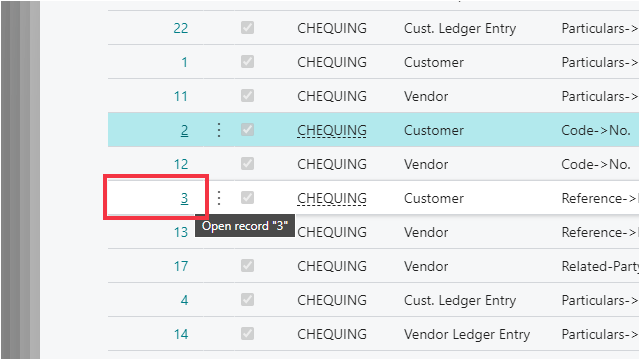
- Click on the toggle field .
- Click on the cell Transformation Rule .
- Click on the link in cell Code with the value COTOC0.

- Click on the cell Transformation.
- Click on the item Transformation Rule in the list.
- Click on the toggle field .
- Click on the back button.
Click on the link in cell ID with the value 10

We will now change an existing rule, swapping the Account Field ID and the Matching Field
- Click on the toggle field .
- Click on the field Account Field ID.

- Click on the cell Field Caption with the value No..
- Click on the button OK.

Click on the link in cell Matching Field with the value No.

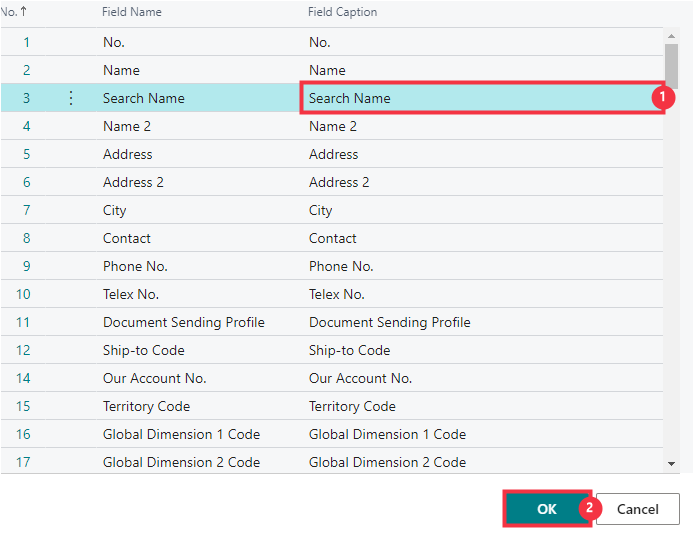
- Click on the cell Field Caption with the value Search Name.
- Click on the button OK.
- Click on the toggle field .
- Click on the back button.
We will now make a rule to match the Package Tracking Number of a Sales Shipment to a Customer account if that has been used as a reference on the payment.
Click on the navigation menu item New
Click on the link for Matching Table
- Click on the cell Object Name with the value Sales Shipment Header.
- Click on the button OK.
- Click on the field Account Type.
- Click on the item Customer in the list.
Click on the link for Account Field ID
- Click on the cell Field Caption with the value Bill-to Customer No..
- Click on the button OK.
Click on the link in cell Bank Recon Field
- Click on the cell Field Caption with the value Reference 1.
- Click on the button OK.
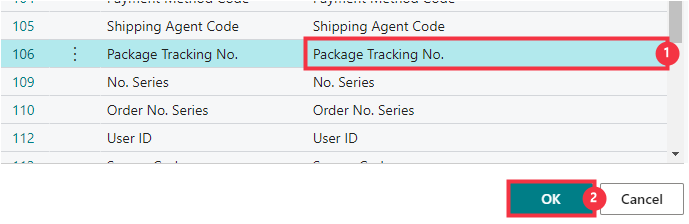
Click on the link in cell Matching Field with the value
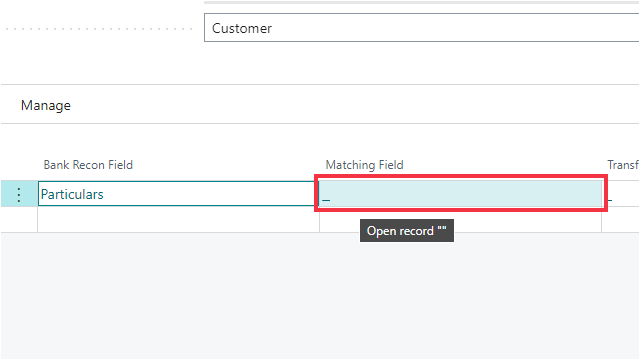
- Click on the cell Field Caption with the value Package Tracking No..
- Click on the button OK.
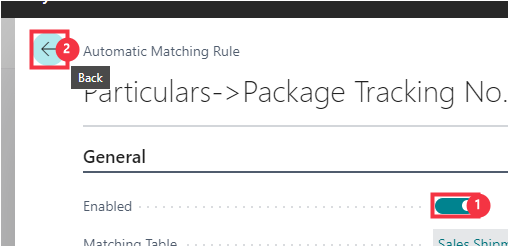
- Click on the toggle field .
- Click on the back button.
3.0.3 Using Mapped Text
Text mappings can be configured for fixed bank statement reconciliation lines received periodically with fixed references or text values.
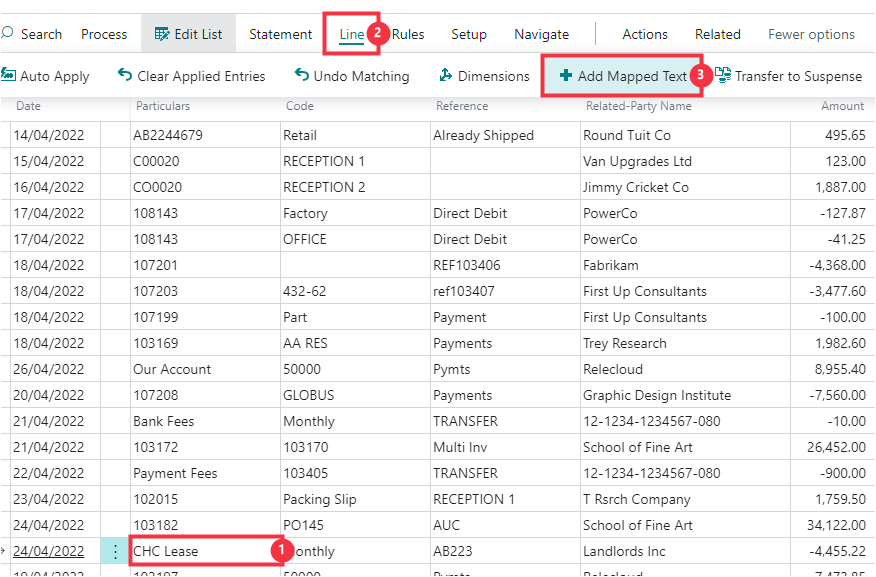
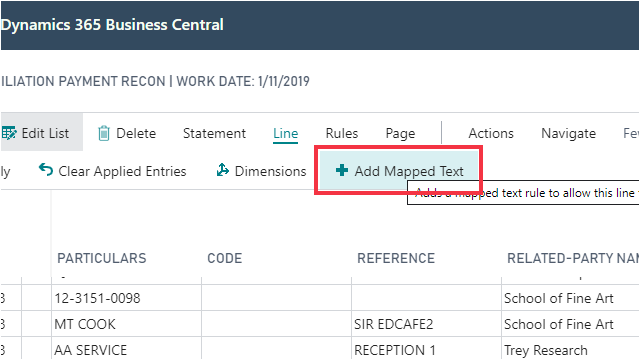
The following steps demonstrate how to map various references using the Add Mapped Text action.
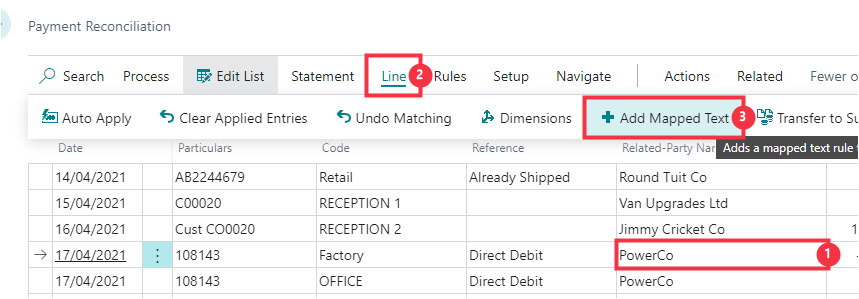
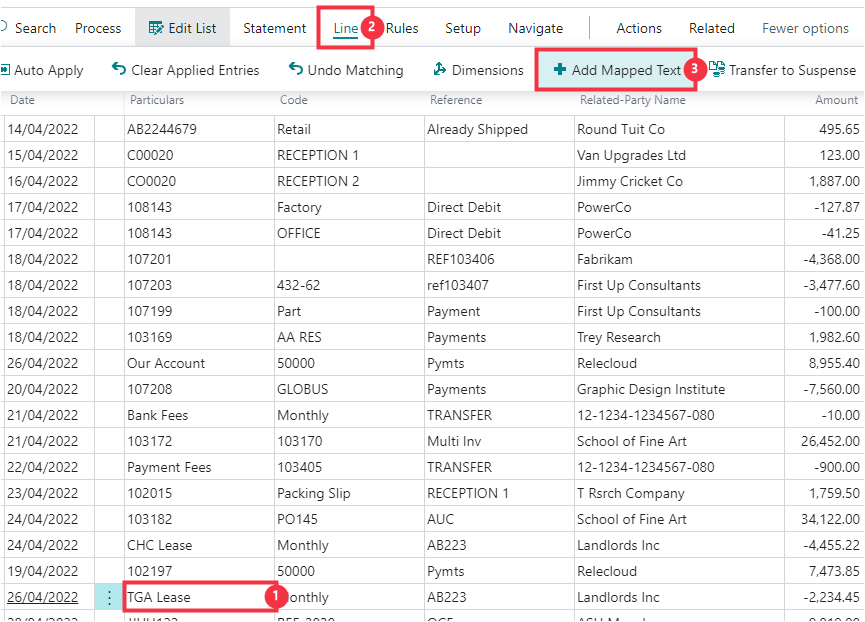
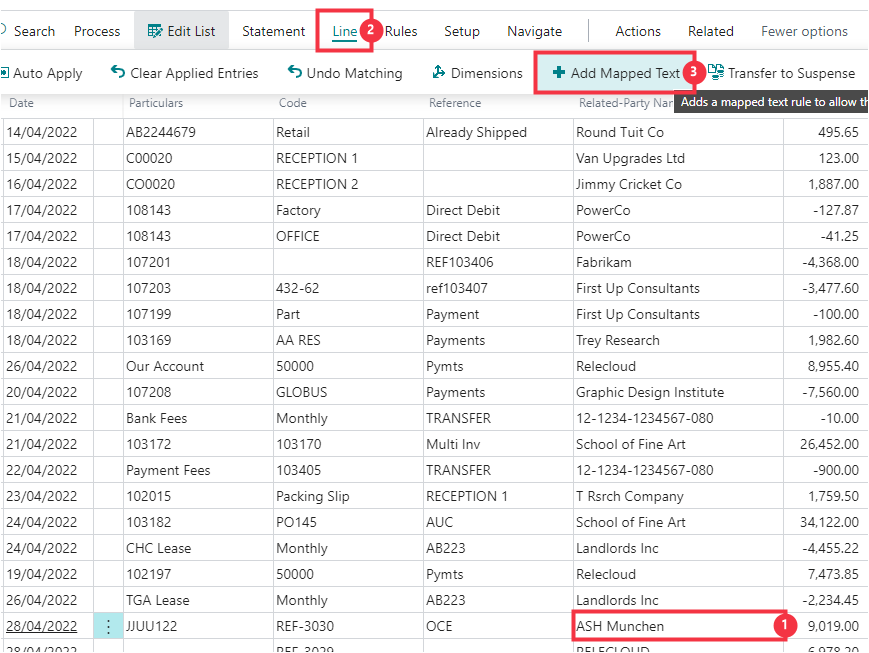
Now we will map text from a line to define the required matching outcome. We will do this for two similar transactions that need to have different Dimension Codes defined.
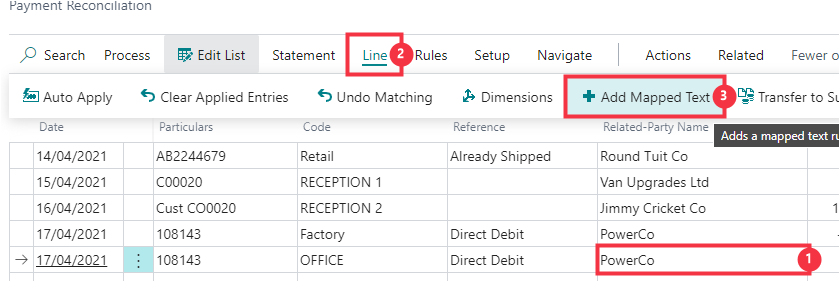
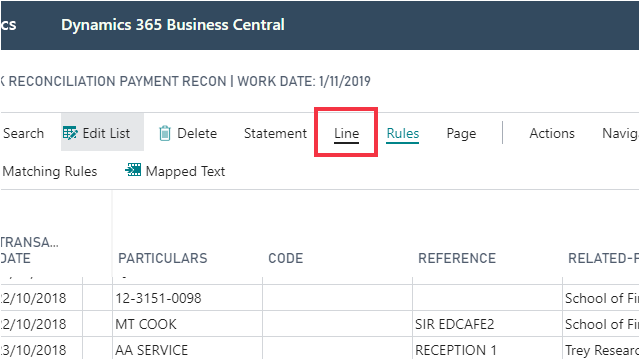
- Click on the line containing the references you want to map.
- Click on the navigation menu item popup Line.
- Click on the navigation menu item Add Mapped Text.
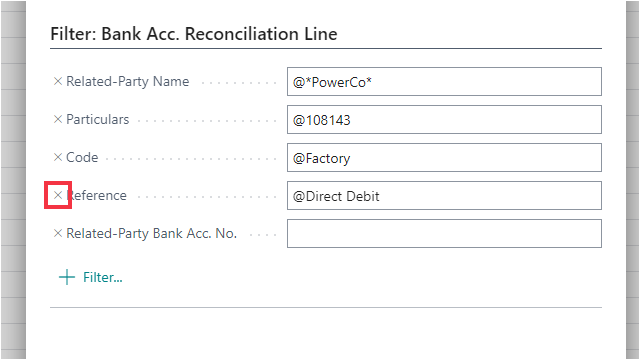
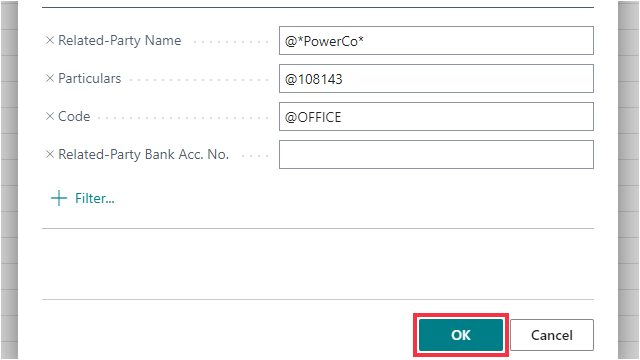
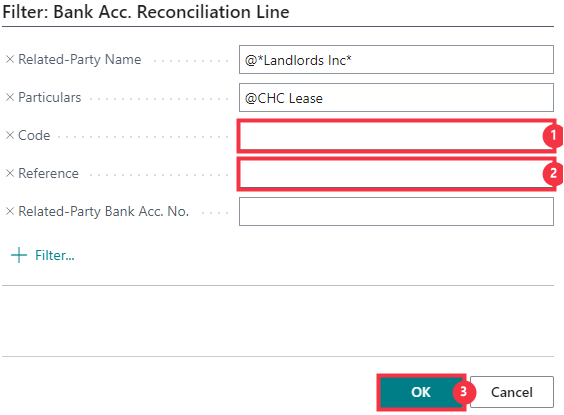
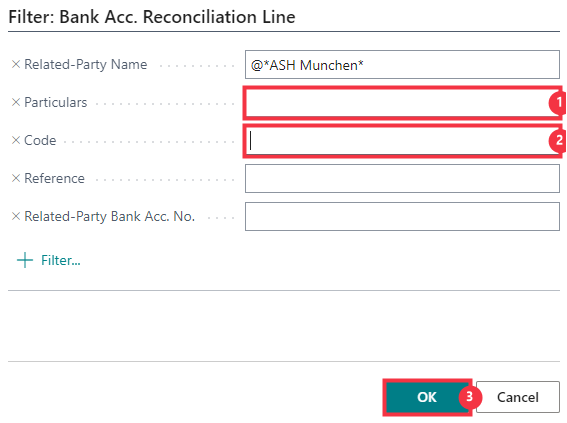
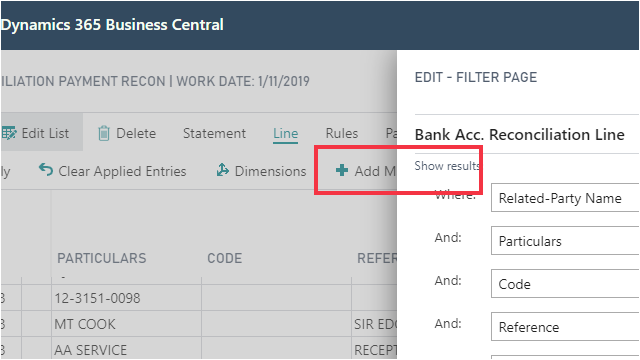
Click on the button Clear this filter next to any filters you do not want included in the mapping
All details on the line selected will be presented as filters. You should only map the details that will stay constant for the mapping you want to create. You can update these later if needed.
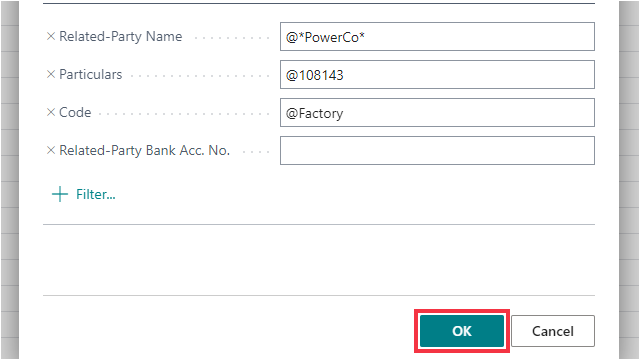
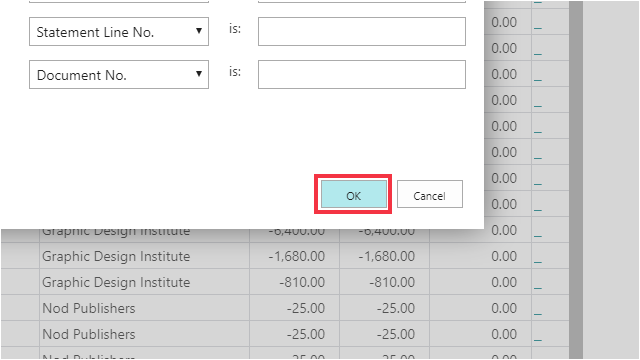
Click on the button OK
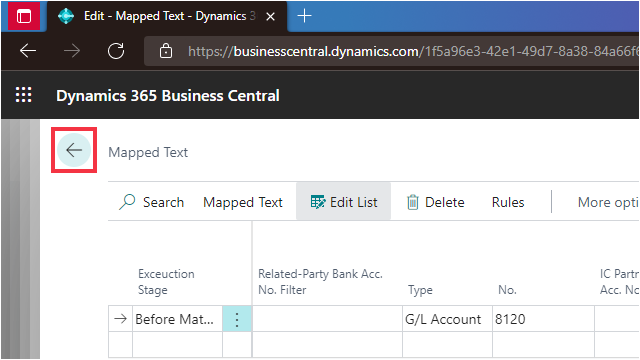
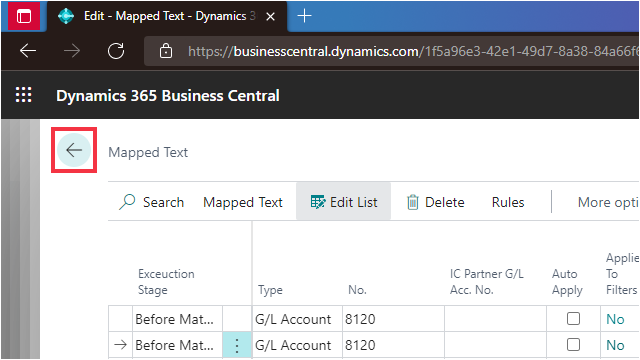
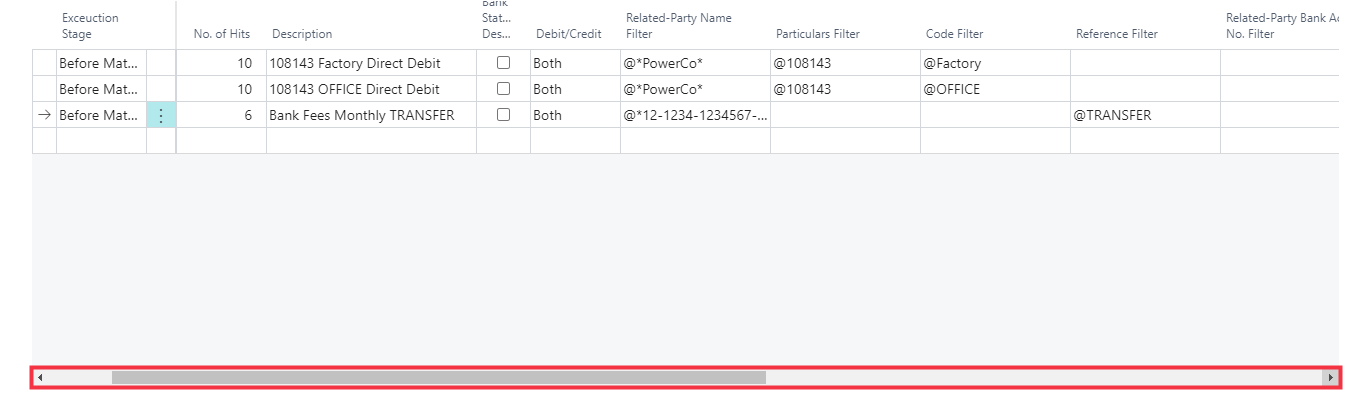
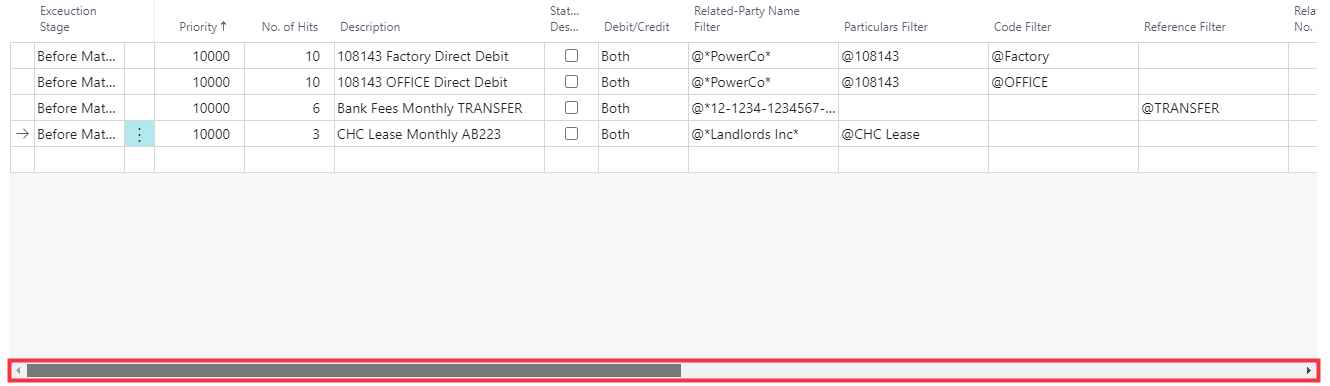
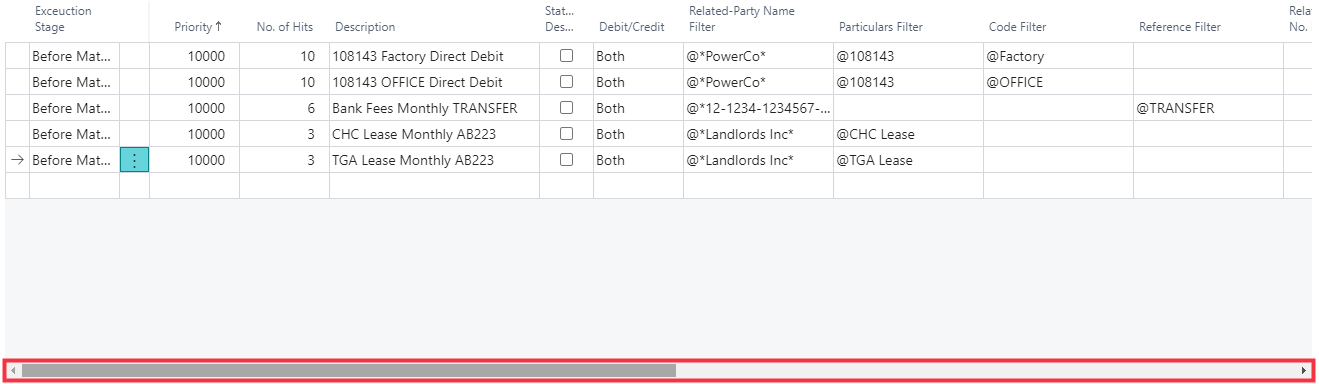
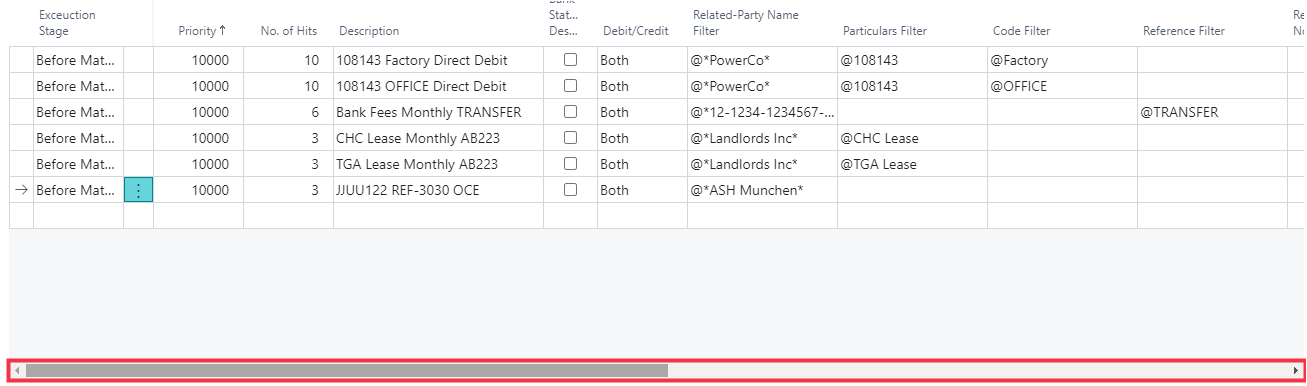
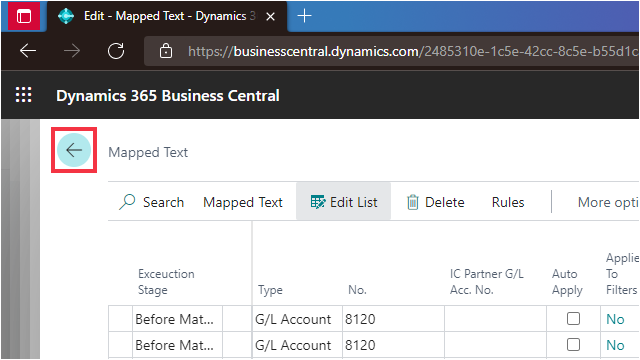
Now the filters you defined are on the Mapped Text page
- Exceuction Stage allows you to specify if the mapped text rule should be used before the automatic matching rules are processed or after.
- Priority specifies the order in which each rule is evaluated during the matching process. The matching process will continue until a rule has criteria that matches the statement line. Change the priority to give preference to a more specific rule.
- No. of Hits specifies the number of times that this mapped text rule has been used for matching. You can use this value to determine the priority of the mapped text rules.
- Description is a comment that gives meaning to the rule and can also be used to replace the description of the statement line which is used when posting. This defaults to the references stringed together but can be changed.
- Overwrite Bank Statment Description specify a value in this field if you wish to overwrite the bank statement description with the value in the comment field when this rule is used.
- Debit/Credit specify if this rule is used for debits, credits or both.
- Related Party Name Filter is the filter criteria for said field when matching.
- Reference1/Particulars Filter is the filter criteria for said field when matching.
- Reference2/Code Filter is the filter criteria for said field when matching.
- Reference3/Reference Filter is the filter criteria for said field when matching.
- Related-Party Bank Acc. No. Filter is the filter criteria for said field when matching.

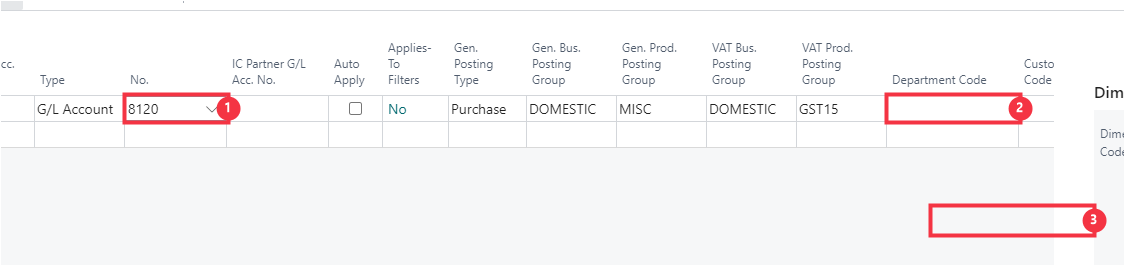
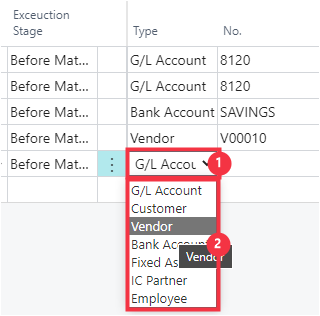
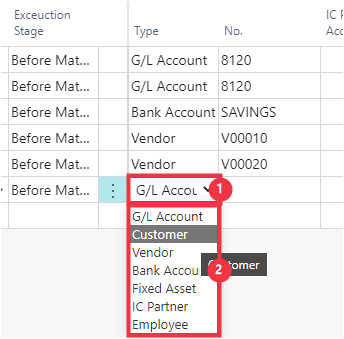
Scroll to the right to now input the account details to map.
- Type is the account type to map to transactions within this filter.
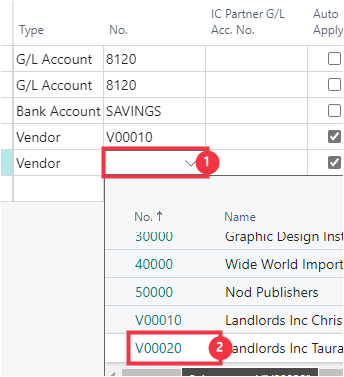
- No. is the account number to map to transactions within this filter.
- IC Partner G/L Acc. No. is the IC partner account no. to apply to the matched line.
- Auto Apply specifies if the matching process should automatically apply to open customer, vendor or employee entries while matching. If selected then the application will apply to the oldest open entries that are not on hold. If this is engaged then you can use the Applies-To Filters field.
- Applies-To Filters allows you to specify additional filters to the customer, vendor or employee entries when automatically applying.
- Gen. Posting Type specifies the general posting type that will be used when you post the entry on this journal line.
- Gen. Bus. Posting Group specifies General Business Posting Group to define on the jouirnal.
- Gen. Prod. Posting Group specifies the item's product type to link transactions made for this item with the appropriate general ledger account according to the general posting setup.
- VAT Bus. Posting Group specifies VAT/GST Business Posting Group to define on the jouirnal.
- VAT Prod. Posting Group specifies VAT/GST Product Posting Group to define on the jouirnal.
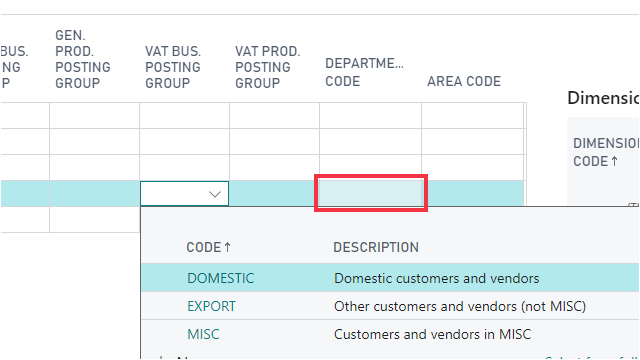
- Department Code specifies the dimension code to define on the jouirnal.
- Customergroup Code specifies the dimension code to define on the jouirnal.

//
- Click on the cell No. - Enter the text 8120. Press the Enter key.
- Click on the cell Department Code .
- Click on the link in cell Code with the value PROD.
Click on the back button
- Click on the next cell Related-Party Name with the next value for PowerCo.
- Click on the navigation menu item popup Line.
- Click on the navigation menu item Add Mapped Text.
Click on the button Clear this filter next to Reference
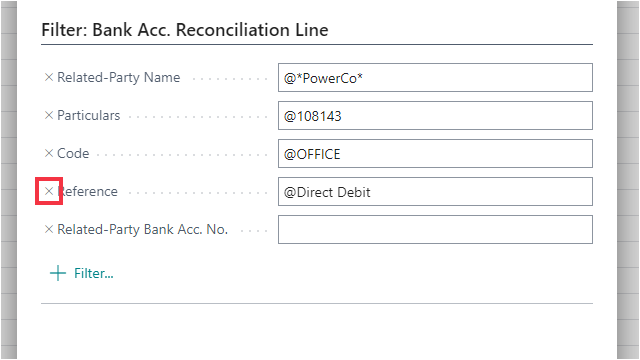
Click on the button OK
Scroll to the right

- Click on the cell No. - Enter the text 8120. Press the Enter key.
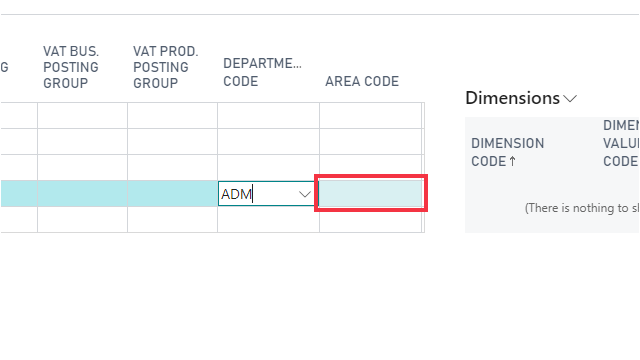
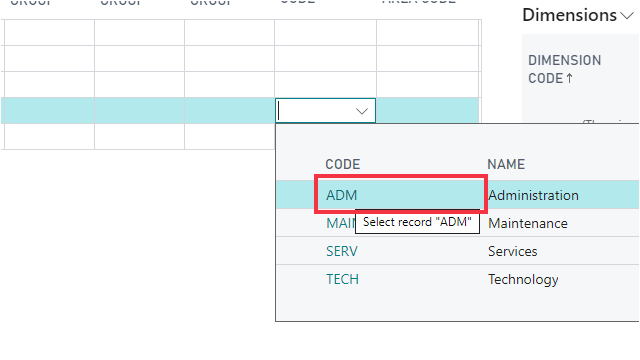
- Click on the cell Department Code .
- Click on the link in cell Code with the value ADM.

Click on the back button
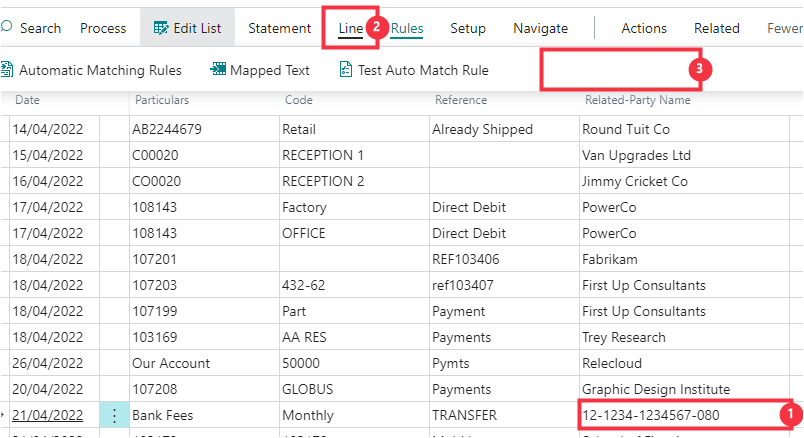
- Click on the cell Related-Party Name with the value 12-1234-1234567-080.
- Click on the navigation menu item popup Line.
- Click on the navigation menu item Add Mapped Text.
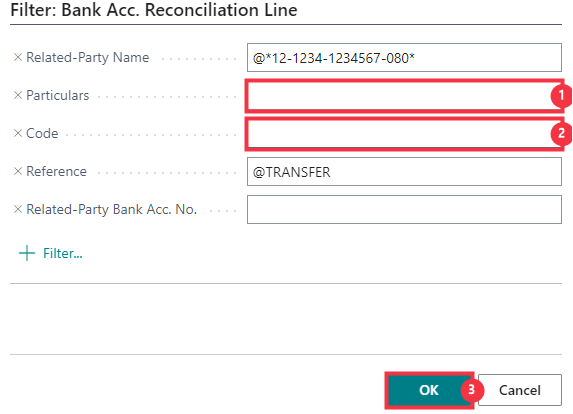
- Click on the field Particulars - Press the Delete key.
- Click on the field Code - Press the Delete key.
- Click on the button OK.
- Scroll to the right.
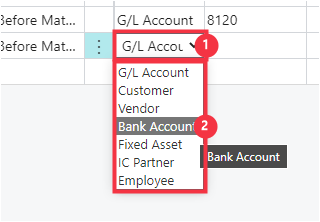
- Click on the cell Type.
- Click on the item Bank Account in the list.
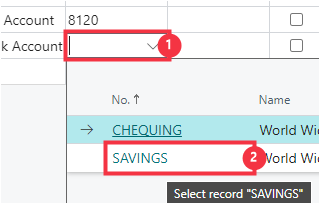
- Click on the cell No. .
- Click on the link in cell No. with the value SAVINGS.
Click on the back button

- Click on the cell Particulars with the value CHC Lease.
- Click on the navigation menu item popup Line.
- Click on the link Add Mapped Text.
- Click on the field Code - Press the Delete key.
- Click on the field Reference - Press the Delete key.
- Click on the button OK.
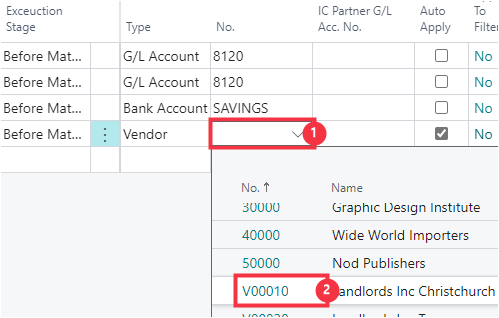
- Scroll to the right.
- Click on the cell Type.
- Click on the item Vendor in the list.

- Click on the cell No. .
- Click on the link in cell No. with the value V00010.
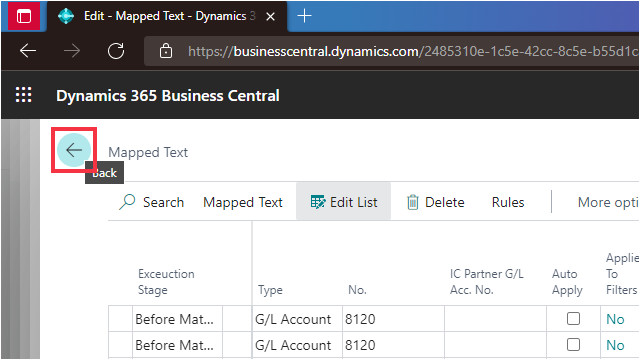
Click on the back button
- Click on the cell Particulars with the value TGA Lease.
- Click on the navigation menu item popup Line.
- Click on the link Add Mapped Text.
- Click on the field Code - Press the Delete key.
- Click on the field Reference - Press the Delete key.
- Click on the button OK.

- Scroll to the right.
- Click on the cell Type.
- Click on the item Vendor in the list.
- Click on the cell No. .
- Click on the link in cell No. with the value V00020.
Click on the back button

- Click on the cell Related-Party Name with the value ASH Munchen.
- Click on the navigation menu item popup Line.
- Click on the navigation menu item Add Mapped Text.
- Click on the field Particulars - Press the Delete key.
- Click on the field Code - Press the Delete key.
- Click on the button OK.
- Scroll to the right.
- Click on the cell Type.
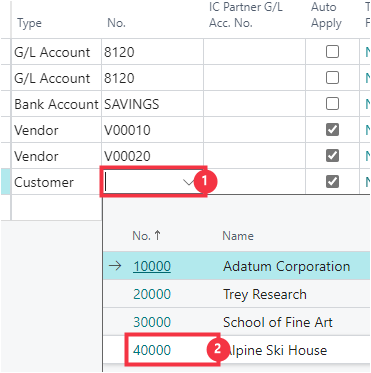
- Click on the item Customer in the list.
- Click on the cell No. .
- Click on the cell No. with the value 40000.
Click on the back button
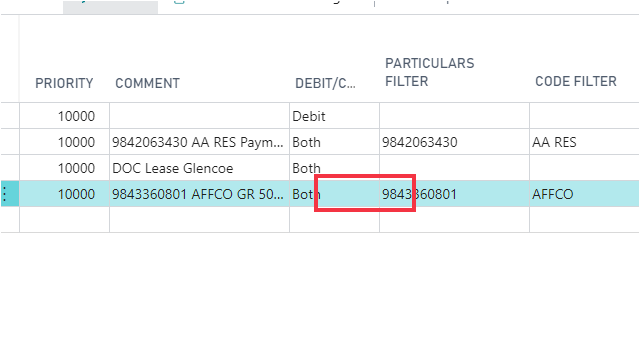
Click on the cell Particulars with the value 9843360801
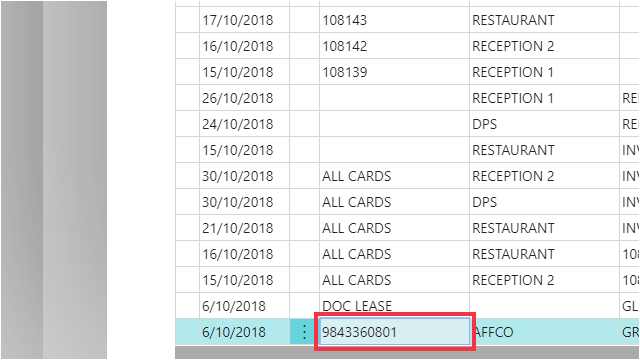
Click on the navigation menu item popup Line
Click on the navigation menu item Add Mapped Text
The system will add filter values as per the lines selected. You can remove unwanted filters if necessary, if you think a certain field may be variable.
Click OK. This will auto-create a record in the Mapped Text configuration page. You will be directed to the Mapped text page to complete the setup.
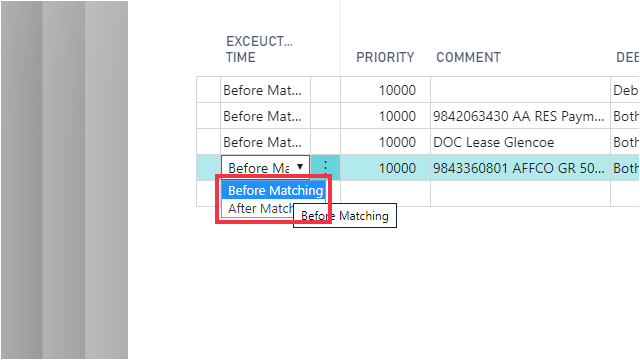
Exceuction Time: Select whether this mapped text rule should be run before or after running the matching rules.
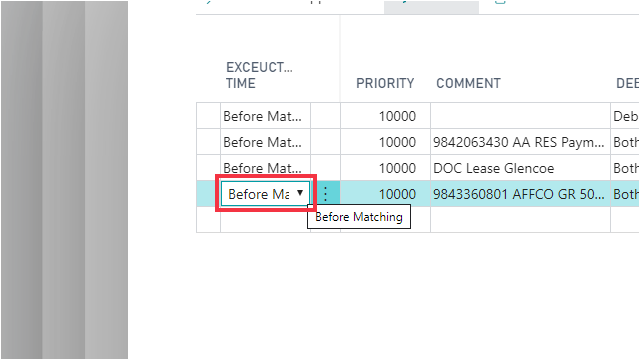
Select Before Matching to execute this mapped text rule before any matching rule. If a statement line satisfies all of the filters setup on this mapped text rule, it will not be reconcilied using Matching Rules.
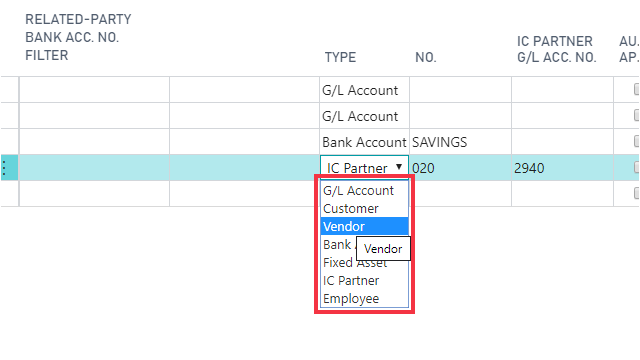
In Type select the account type against which the statement line will be reconcilied if the mapped text rule applies.
In our example, we want to reconcile the statement line with a vendor account when the mapped "particulars" text is found in the statement. Select Vendor from the list.
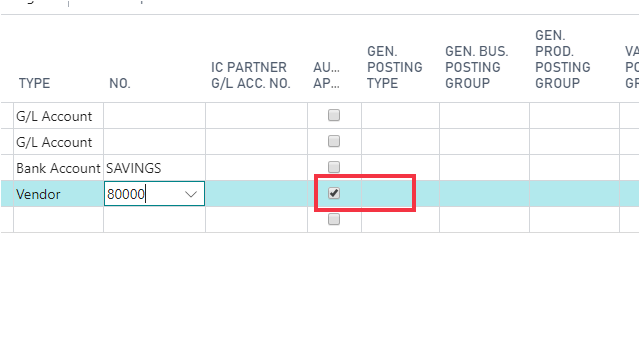
In the No. field select the vendor account number against which the statement line will be applied. In this example we want to apply this Particulars text to vendor no. 80000.

You can override the default GST posting setup on the vendor by selecting a VAT Bus. Posting Group.
Optionally, you can select dimension codes to include on the transaction. When application is complete, a payment journal line will be created against this vendor account, and the selected dimensions will be populated in the journal.
In our example, we will select the ADM Department dimension.
When done setting up the mapped text, close the page and return to the Bank Reconciliation Payment Recon page.